Updated to 1.20
with Overworld to Nether calculator – check below
Sometimes in Minecraft you find places of interest that are far away from your base. With places of interest we could have for example Spawners, End Portals, rare biomes, Villages and others. Then, traveling from one place to the other can then become very tedious and time consuming.
But there is a solution to this: a Nether highway. Let’s see how to build one!
Why a Nether highway
The coordinates of one place in the Overwolrd are 8 times the coordinates of its Nether counterpart.
For example, let’s say that you are in the Overworld, standing in front of a Nether Portal. You look at your coordinates: X=800 – Z=800.
You then jump into the Portal and you arrive to the Nether. Now your coordinates are X=100 – Z=100.
Given this relationship between coordinates in the Overworld and in the Nether, if you travel one block in the Nether you are also traveling 8 blocks of the Overworld. That’s why it is advisable to travel long distances in the NEther, because they will take 8 times less… time.
That’s also why on 2b2t, the oldest Anarchy server in Minecraft, they built a system of Nether highways to make it easier to travel through its huge map.
How to build a Nether highway
To see how to do this in details, we will follow together the construction of a Nether highway that connects a Desert Village and an Abandoned Mineshaft.
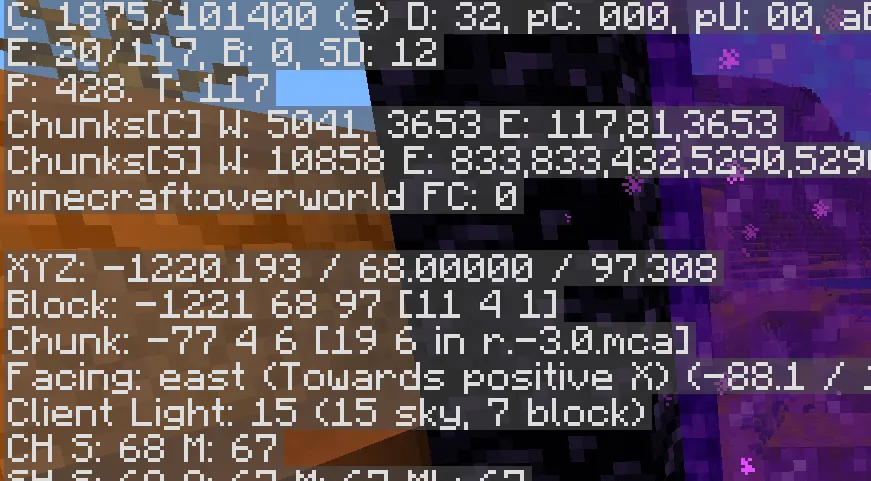
The first thing that you want to do is go to the destination and write down the coordinates. In this example I wrote down the following coordinates:
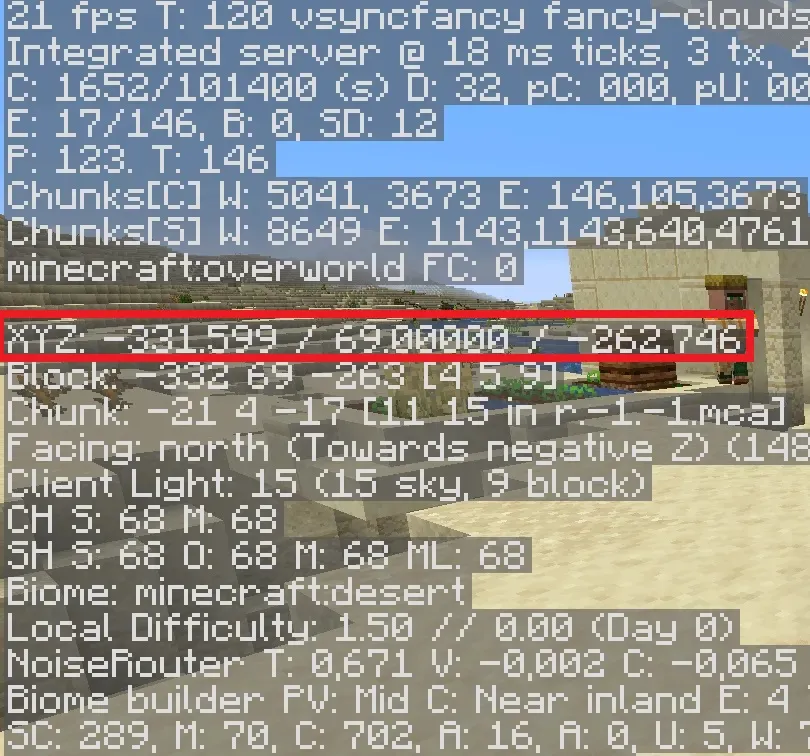
To see your coordinates you just have to press F3. You only need the X and Z coordinates, the Y is irrelevant for our purpose. We will see later why.
Now that we have the destination coordinates, we need to go to the starting point.
From there, we will build a Nether Portal, wherever we prefer it to be.
Reminder: for a Nether Portal you will need at least 10 blocks of Obsidian, and a Flint and Steel. When the portal is ready, we will light it with the Flint and Steel and walk through it.
In the Nether
Now we are in the Nether. As you can see, the coordinates are more or less 1/8 of the Overworld coordinates (not an exact match, but pretty close).
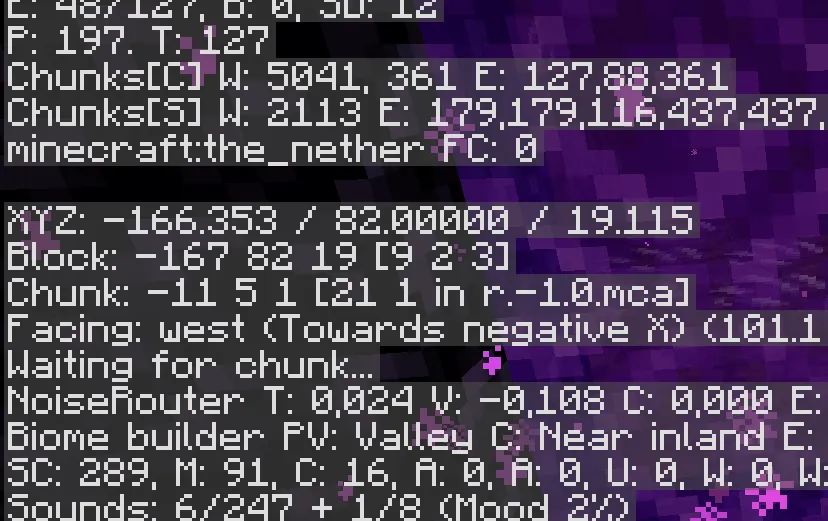
The next step is to calculate the Nether coordinates of the destination. You can do so with the help of the Overworld to Nether Calculator:
Overworld to Nether calculator
For example by putting X=-332 and Y=-263 (the coordinates previously seen at the destination), I obtained X=-41.5 and Z=-32.875.
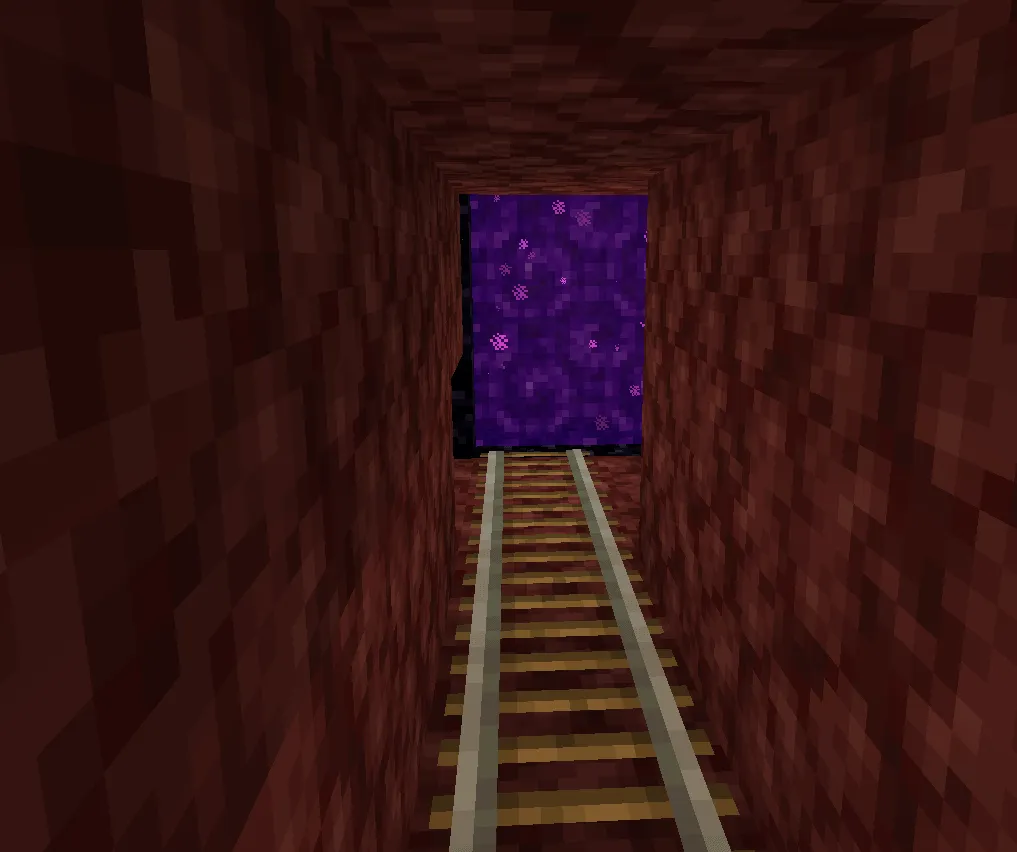
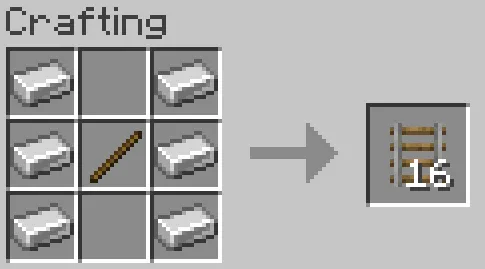
Now all you have to do is connect with Rails where you are now to the destination coordinates. To craft Rails you will need 6 Iron Ingots and 1 Stick:
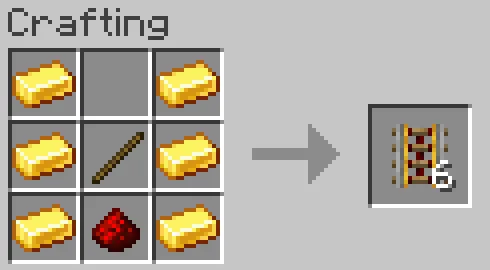
It could also help to put some Powered Rails here and there, to travel faster. To craft Powered Rails you will need 6 Gold Ingots, 1 Stick and 1 Redstone Dust:
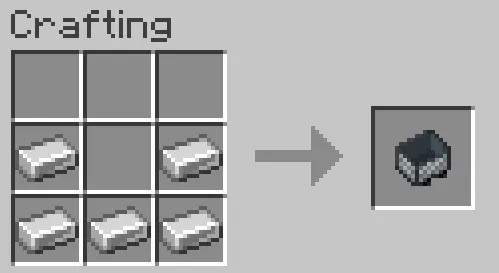
Finally, to craft a Minecart you will need 5 Iron Ingots:
A few tips on building your railways:
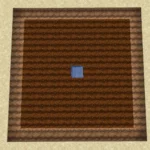
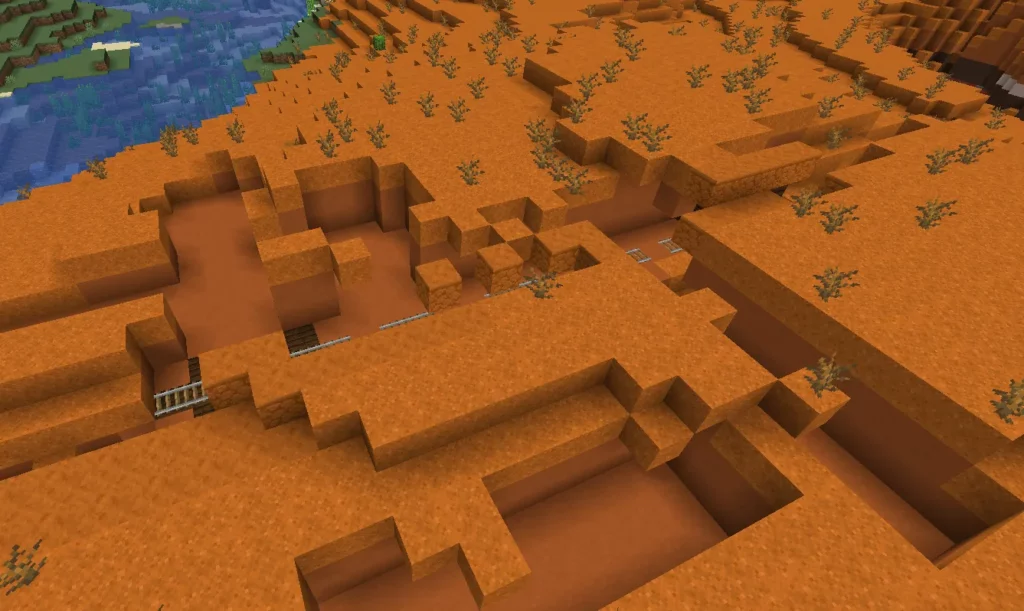
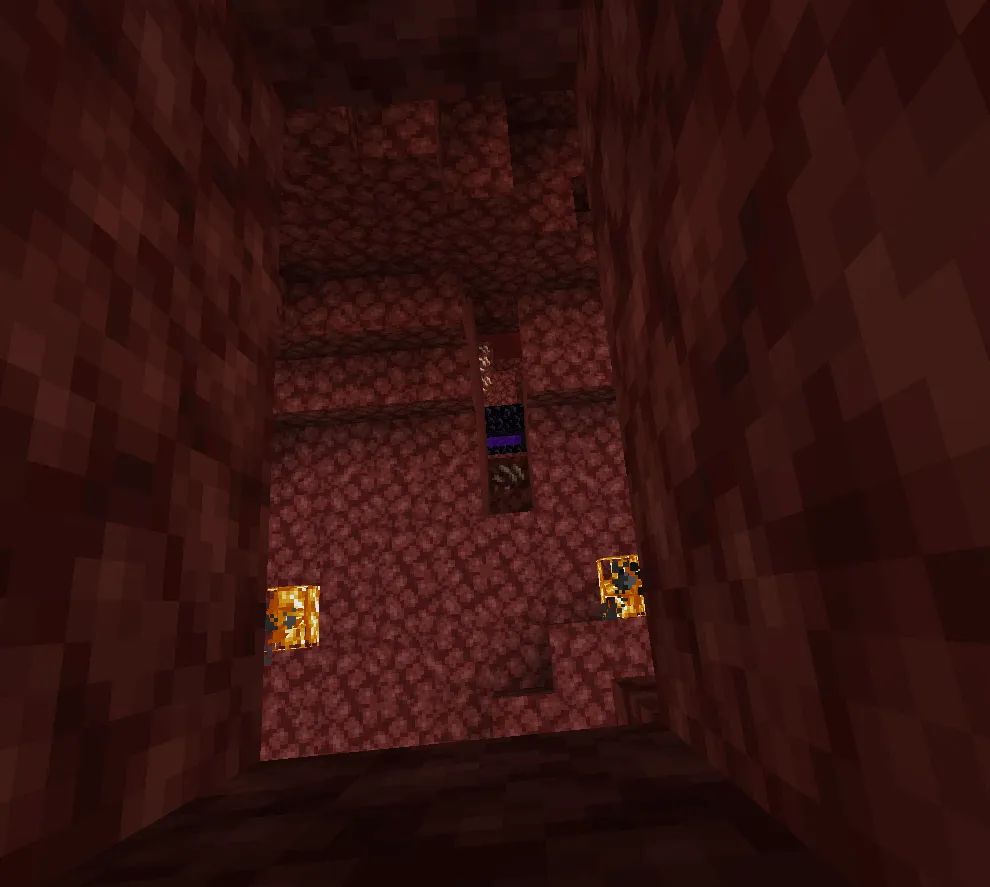
- to prevent mobs from spawning on your railways, you should place them inside 1x2blocks tunnels (as explained in How to stop Zombie Pigmen from spawning in Minecraft?):
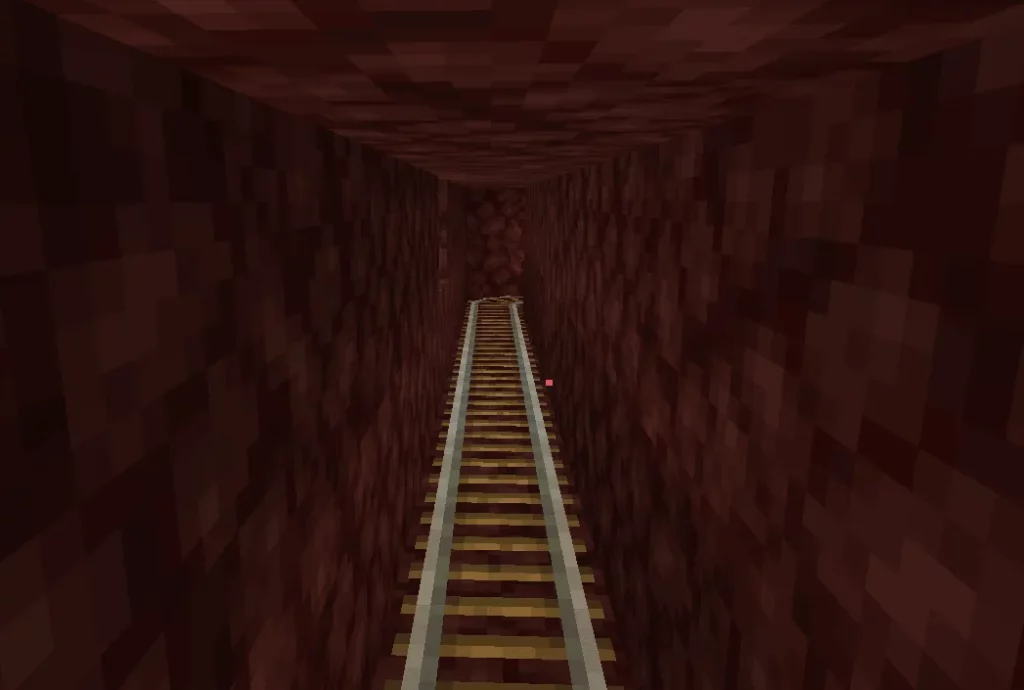
To do so, the easiest thing to do is to mine your tunnel over the Nether roof, close to the Bedrock level (which is at Y=128). This way your tunnel will not be interrupted by any building or empty area.
- Rails can’t go diagonally, so you should mine the connecting tunnel in 2 sections. One section will travel along the X axis and the other one will travel along the Z axis
- If you build your tunnel close to the Bedrock level, the tunnel will be high up and far from your starting Nether Portal.
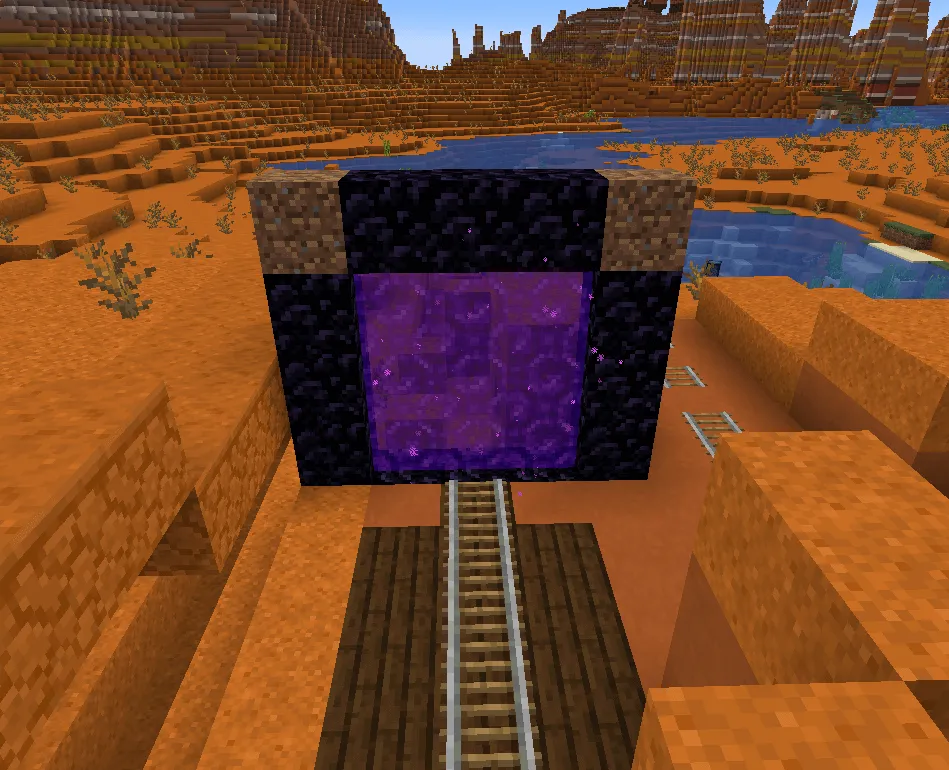
This is quite annoying, because now every time that you come to the Nether you have to go from the portal to the tunnel (with Ladders, presumably). To solve this problem, you want to first deactivate the portal in the Nether. To do so, just break one of the Obsidian blocks.
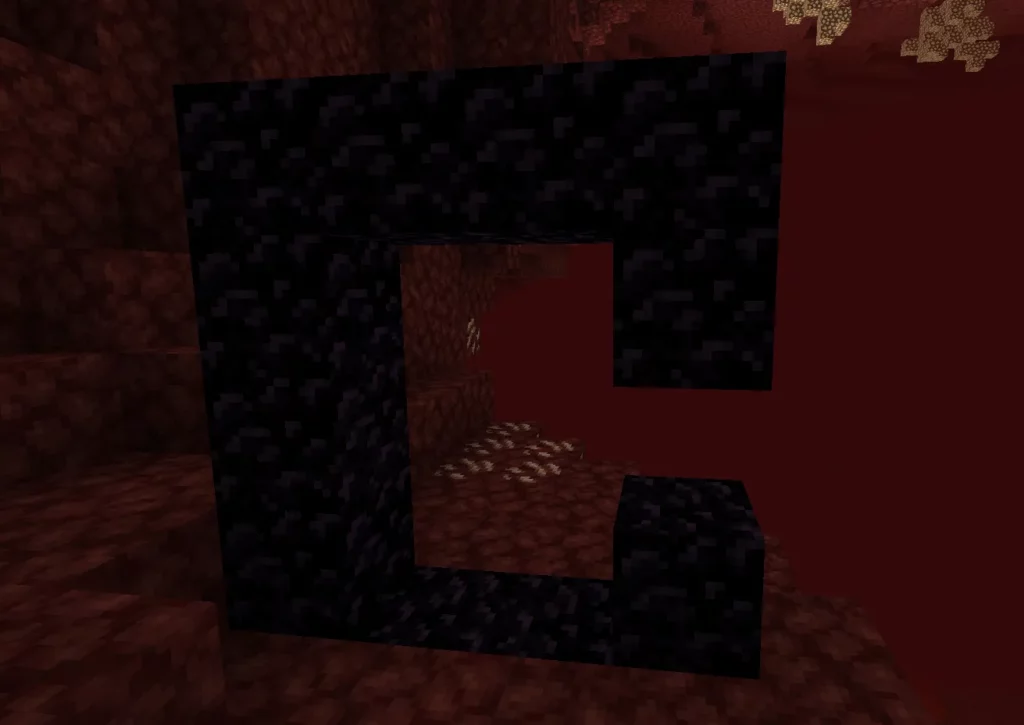
Then build another portal next to the tunnel.
Since this new portal is very close to where the old one was, the new portal will be linked to the portal in the Overworld. Now every time that you come to the Nether (going through the Overworld starting portal) you will come out of the new portal.
If you want to know more about Nether Portal linking, you can check the video below.
Destination
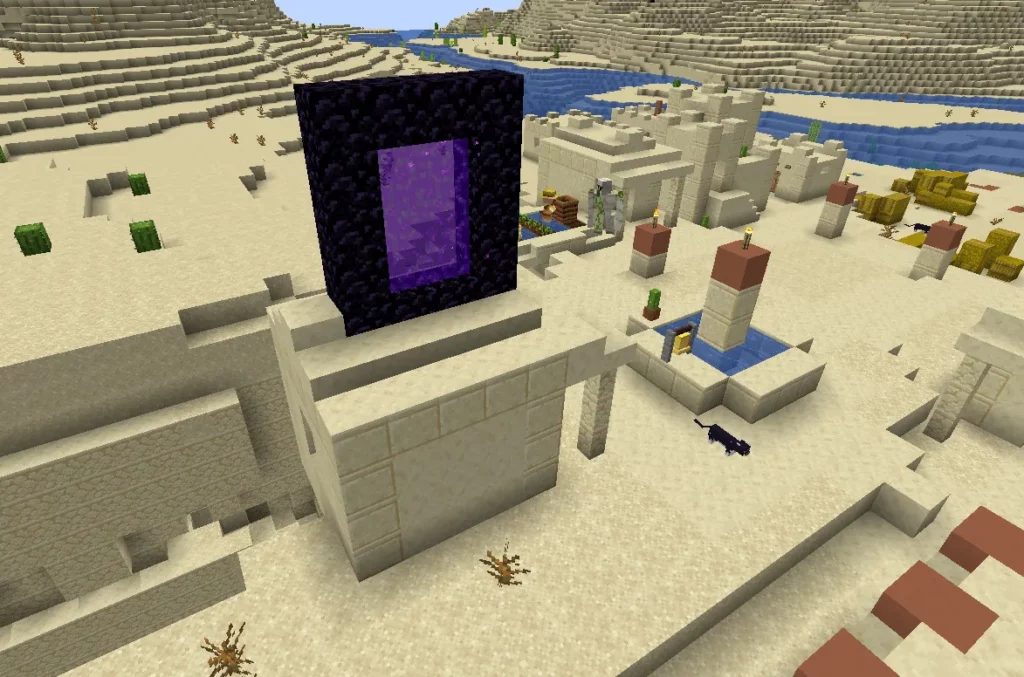
At the destination Nether coordinates, we build another Nether Portal.
After walking through it we are in the Overworld again, and we are very close to the destination coordinates.
Now the last optional thing to do is to deactivate this Nether portal and build another one where we want it to be. This way, the new portal will link to the tunnel portal in the Nether, as we saw previously.
Other variations
This is not the only way to build a Nether highway. For example you could build Ice higways, using Ice and traveling through them with a Boat. Or you could first build both Nether Portals in the Overworld before building the Nether tunnel, so that you don’t need to link the arrival portal. But the method that we just saw here is the easiest and most straightforward one.
Conclusion
Traveling in the Nether is 8 times faster, so a Nether highway can be very helpful. It is advisable to build a Nether highway inside a 1x2blocks tunnel close to the top Bedrock level, to prevent mobs from spawning on the Rails. Thank you very much for reading the article till the very end and I hope I’ll see you again around here. See you and take care!